
1886 Lynwood Drive/Concord,
CA 94519
Telephone: (925) 671-9674 Fax: (707) 988-2290
Introduction: There are two types of costing programs in this system, "Simple Costing" and "Costing". The Costing program is designed to give you the most accurate display of profitability available. If you are using inventory, the system is designed to calculate the cost of your inventory against the charged amount of material. The inventory cost is determined by the total remaining cost of the specific item divided by the remaining quantity on hand then multiplied by the quantity used. If you do not use inventory, the system assumes that the cost of material is the same as the charge and therefore will zero itself out. The labor cost is determined by the employee wages multiplied by the actual time worked on the job, therefore the labor profit is the actual charge for labor minus the labor cost. The proficiency percent is the actual labor cost divided by the labor charge.
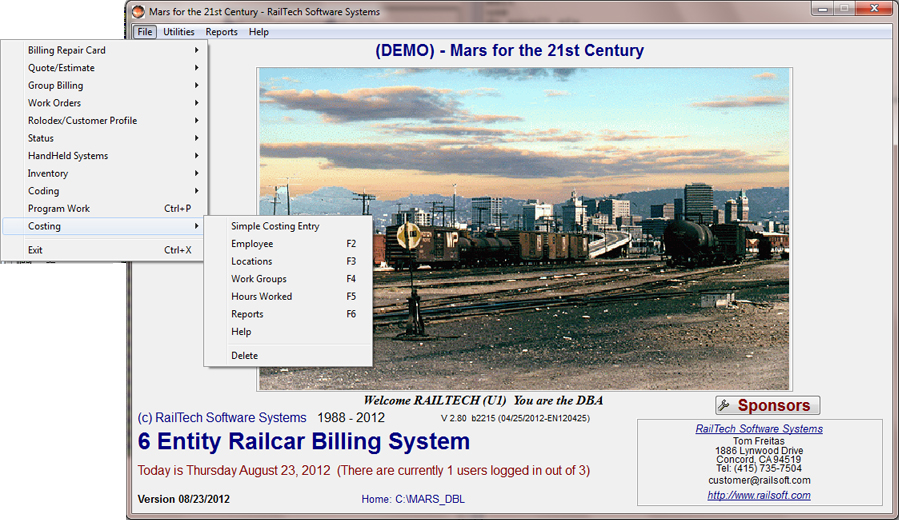
From the main menu, select “Files” then “Costing”. All you need to do at this point is select which function you want to perform.
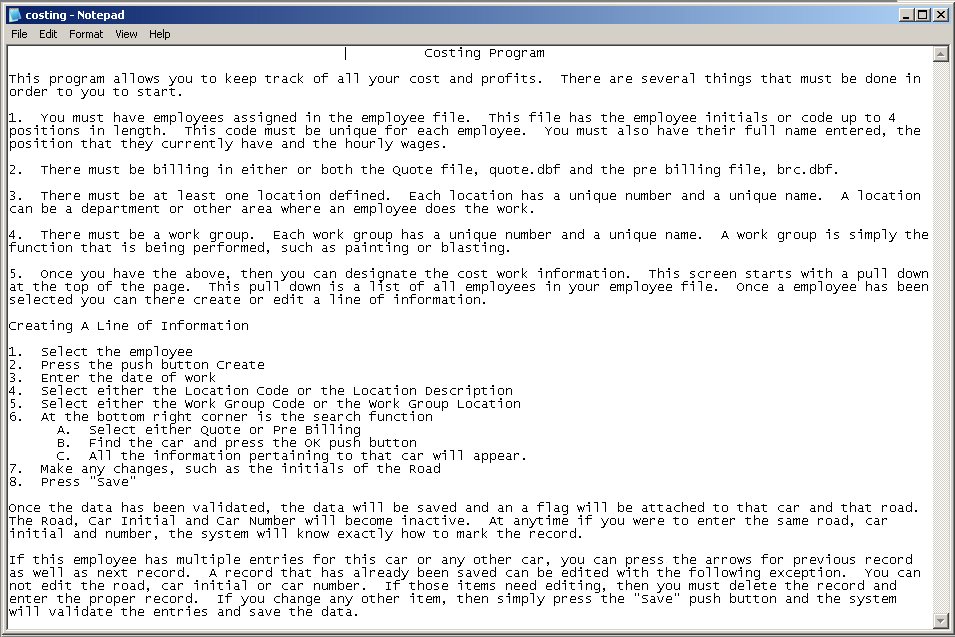
The help selection will display our help screen using the MS Window notepad program. This means that you can customize your help to say what you want for better clarity to you and/or your company. You may also print from this screen as you normally would when using notepad. The file must always be saved using the same name, costing.txt, and placed in the same directory as the program.
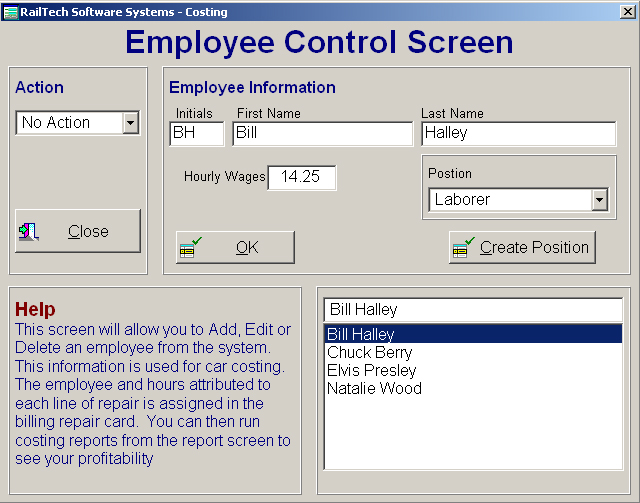
The employee function allows you to Add, Edit or Delete an employee from the system. This screen is where all the name, wages and position of each employee is kept. When the system determines the actual cost of repairs, it uses this file to retrieve that wages of each employee.
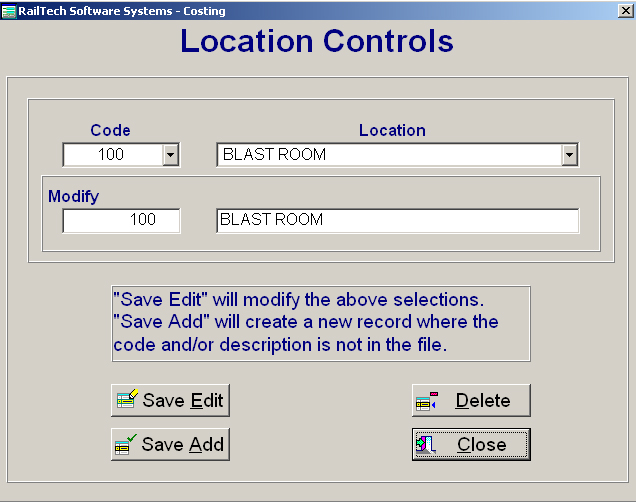
The Location Code and Name can be anything that you require. Generally speaking this would be a main area of work, such as a Blast Room. An example would be a table of contents with this being the main subject.
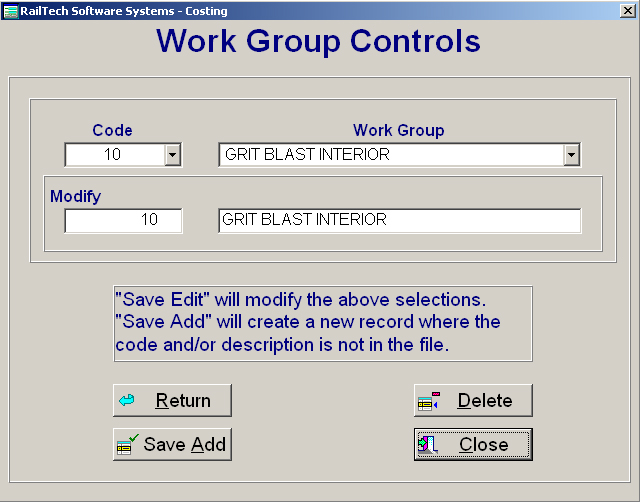
The Work Group Code and Name is a sub group of the location code and name. This would be the actual worked performed, such as Grit Blast Interior. An example would be a sub group to the main topic in a table of contents.
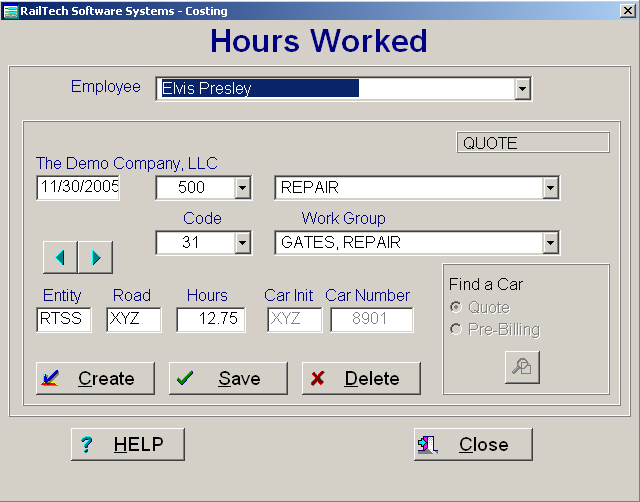
The hours worked screen is where you enter each individual function performed by an employee on a specific date, location, work group and car. You must first select an employees name from the pull down at the top of the screen. When you do this, the last record entered for that employee will appear. If you need to edit a record for that employee, you can move to the previous or next record by pressing the arrow push button on the left of the screen. When you find the record to be changed, make the changed and press the “Save” push button. After the system validates the entry, the data will be saved. When editing, you can not change the following fields; Entity, Road, Car Initial or Car Number. If any of those fields need to be changed, then you must delete the line by pressing the Delete push button and enter a new line. When a car has been invoiced you can no longer see it with this screen as it contains only current or active information.
To create a new line for the selected employee, press the Create push button and all fields become blank. The entity will remain inactive unless you are licensed to have more then one entity. You may either enter the car initial and number or select by using the “Find a Car” function on the right. To find a car, simply select the file that the car is or might be in and press the push button. A list of all cars will appear where you can select the car you want. If you accept a car, then the car initial and number will appear in the appropriate fields. If you just enter the car initial and number, the system will automatically look in both the quote file and the pre billing file for the car. If it is there, it will display the file it came from at the top right of the screen. The car must be in either the quote or pre billing file before you can enter any information.
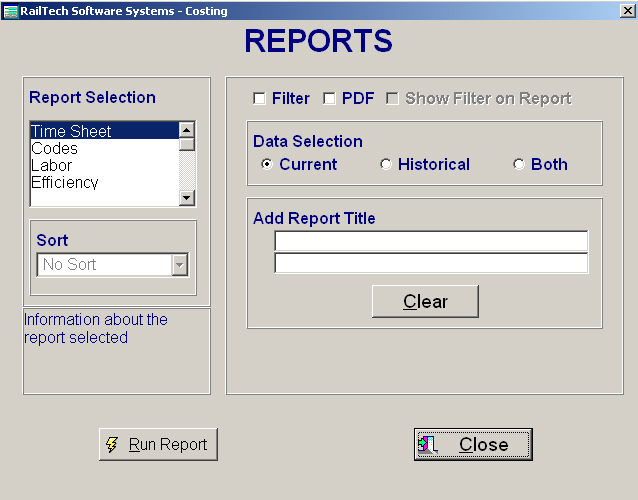
The report screen will allow you to select from various reports. Any report can be filtered by clicking the “Filter” check box. You may also check the “Show Filter on Report” check box when you are filtering a report. If you display a filter on the report, the system will show it at the end of the report. You may also save the report as a pdf file by clicking on the PDF check box. All pdf files are printed to the directory that the program is in and are named the same as the report. The data selection is only for reports that are not filtered. A historical record is a car that has been invoiced and carries an invoice date. If you select “Filter”, then the data selections become inactive and the selection of “Both” is automatically selected. As an example; If you wanted only current records when filtering, then one of your filter selections would be something like, “where inv_date = {//}. See the selection in the “Guided Tour – Billing System” that pertains the filtering reports for a better understanding on how this powerful utility works. The Add Report Titles allows you to enter sub titles under the main heading of each report. The Sort under the Report Selection is only for the Labor report. This selection will allow you to sort this report almost any way you want and will display sub totals by the sort selected. Some examples of the sort or by Employee, Car Initial, Car Initial and Number, Road, Entity and so on.
Reports Available in Costing Program are;
Time Slip This report is a blank time card that can be used by the employee for showing time worked on a car
Codes This report is a listing of all Location Codes, Location Names and then Work Group Codes and Work Group Names
Labor This report is a detail report sorted multiple way of the work performed showing the Actual time and Actual Labor Cost
Efficiency This report is a report by road showing the material and labor charged as well as the actual material and labor cost, profit and labor efficiency
Select the report in
the left menu under costing to view as created by the costing program.