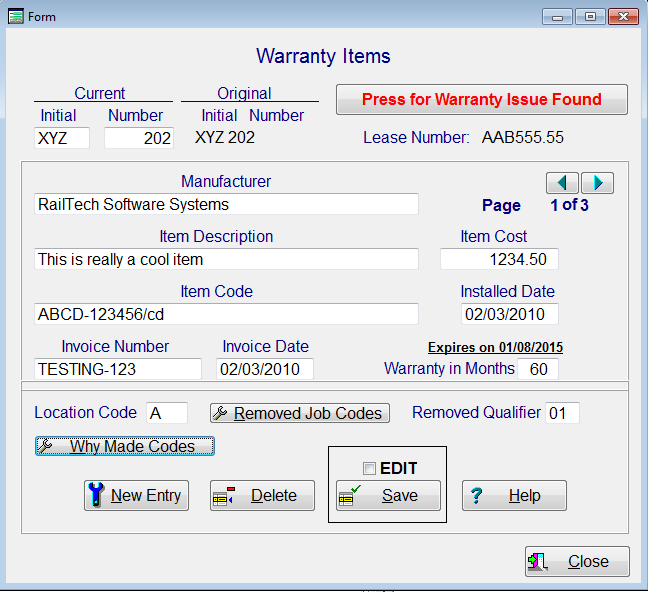
This screen will assist you in keeping track of all warranty parts for each unit. When you enter a units initial and number, the system will first look up the original initial and original number of the unit. It will then look at all records in all files that have the same original initial and original number.
If the location code is blank or the why made code is blank, then the system does not validate those fields. If any of those fields have a value in it, then the system will look for an exact match where the removed job code is equal to or in the list of the warranty job code(s) and the repair date is greater then the installed date but less then the installed date plus the guarantee month times 30.
The system will inform you of the removed qualifier if it is not the same as what is in the warranty file. However, it is still considered a warranty issue since the part itself was changed out. If the qualifier is not the same, then it is assumed that the billing party simply made a typeographical error which should be verified prior to submitting any claims.
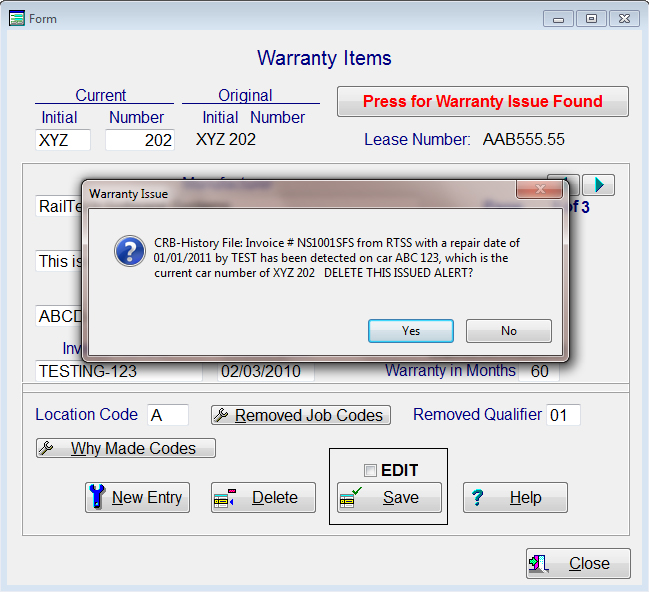
If the system finds a record that matches the criteria above, then it will write a description in the warranty table for that part showing which file it found the record with the invoice number, who billed the repair, who repaired the car, what date it was repaired and if the car initial or number has changed, it will inform you of the current car initial and number as displayed below.
The Warranty control function utilizes the removed job code, removed qualifier, location code and why made codes.
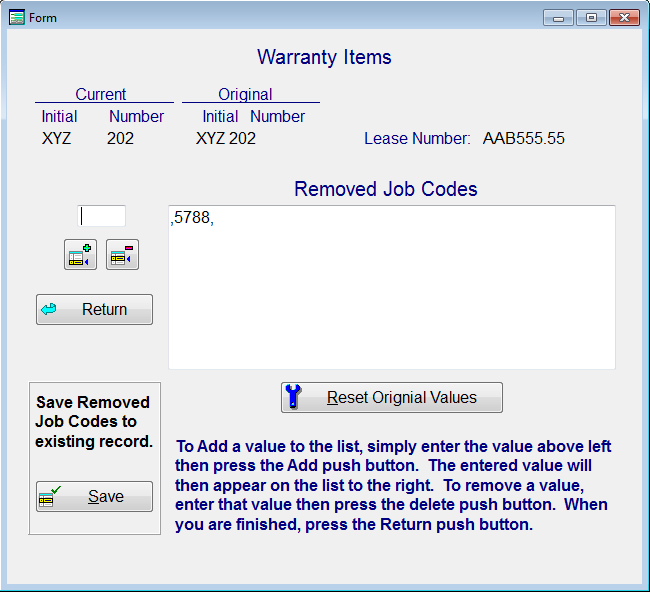
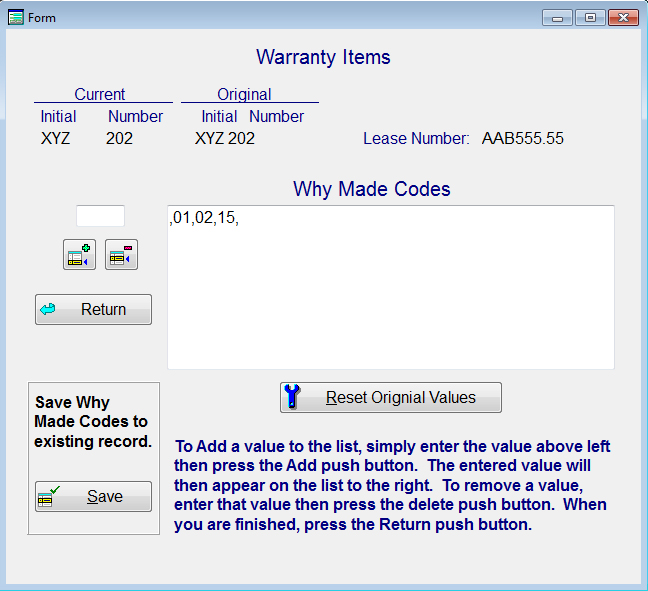
There must always be at least one job code, which can be an AAR job code, NitLeague job code or a User job code. The removed qualifier is used only if the qualifier has a number assigned to it. Number qualifiers usually indicate the manufacturer of the item. In most cases a warranty item goes at a specific location on a unit and therefore, the location that the item was installed on should also be indicated. In some cases, the warranty only applies for a specific why made codes, such as 02 broken.
If the item has multiple why made codes or job codes, then press the appropriate push button on the first page and enter each why made or job code then press the "Add" push button. If you need to remove a why made or job code from the list, then enter that why made or job code code and press the "Delete" push button
If you are editing a record, then you must check the "EDIT" check box so that the system does not think that this is a duplication of a line already entered. When you are editing, all the repair data for the guarantee becomes inactive and if you changed any of the items, then the system will convert them back to what they were. This is because the edit function is only for the information above the warranty part information.
Once you are finished, the system will validate what you entered then make sure that there are no other entries in the file that are identical to the entry.
The system is also designed to immediately look at all files to see if the warranty condition is already on file where a repair was made after the installation date. If there is a Warranty issue, then a push button will appear at the top right of the screen informing you of a warranty issue. If you press the push button, a message will inform you exactly where the warranty issue was found.
When you first start the warranty program, the system will check for warranties out of date. That is to say, what warranties have expired based on the installation date plus the number of months that the warranty is good for. If it finds any out of date warranties, then the system will tell you how many it found and ask if you want the system to delete those items from the warranty table. If you state "YES" to delete these items, then they will be deleted entirely from the system. You can also delete individual lines at any time by pressing the "DELETE" push button.
During the AUDIT of repair data, the system will look for any warranty issues in the pre-audit file only. Since all files are validated when you enter a warranty item, there is no need to validate this again in the other files. If you wish to validate a specific item in all files again, you can go into this warranty page, select "EDIT" and press the SAVE push button.