Overview
The TTX Unified Billing System for Contract Shops is to be used only with the authorization of TTX Company and is
only used for completed invoices. TTX-UBS utilizes heavy coding required by TTX. The coding comes from TTX in a
text format and must be uploaded into the Mars21 program. The total number of records is currently just below
480,000 records.
HINT: When you download the TTX control data text file, they should go into a folder under your c:\ drive for easy retreival by the Mars21 program. Once you have downloaded the text control data from TTX, you must upload it into the Mars21 system.
The Mars21 program reads the files the same way that Windows reads text files that are over 8 characters in length. The first 6 positions are the file name, than a tide sign and the number 1 is added. Example: If a file were named VENDOR_201503271440160834.TXT, the system and Windows would see it as VENDOR~1.TXT.
If you had other files in there with the same first 6 characters, the system would find the first one and would upload it thinking that this is the correct one, when it actually is not. This is why it is extremely important to keep the folder that holds the TTX Control Text Data empty of all data prior to downloading the current TTX Control Text Data.
The reason why we look at the first 6 positions only, is because they should never change. However, the numbers within the file name change each time that a new file is sent or downloaded. Because the first 6 position should never change, you will, most likely, never have to modify the file names within this program. (See Uploading TTX Text Control Data below).
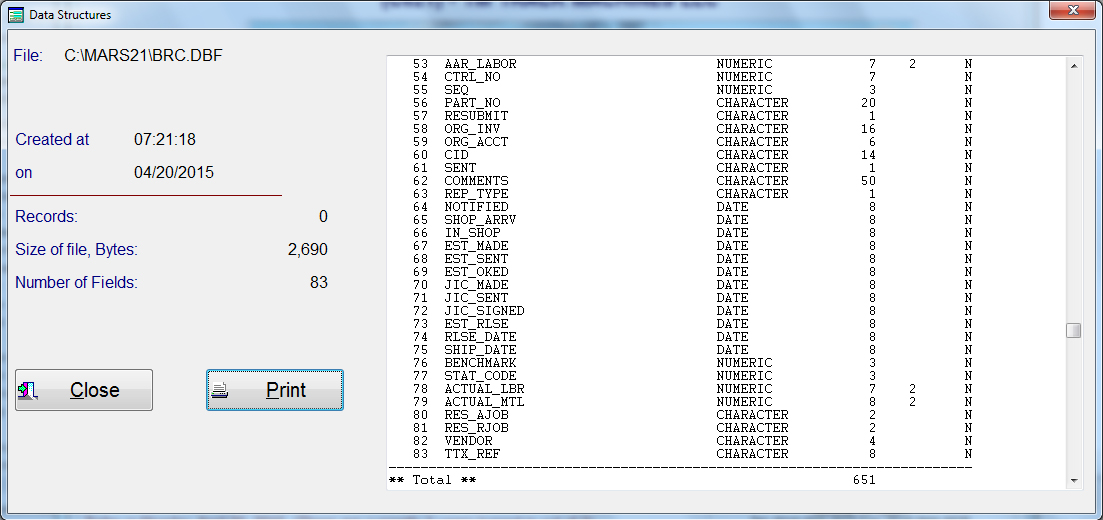
Verifying TTX-UBS Data Structure ReadyThere are four files, (BRC.DBF, QUOTE.DBF, SUSPENSE.DBF, BRCHIST.DBF), on the system that utilize the data structure for repairs using the TTX-UBS format. You should verify that each of these files have 83 fields and that the last four fields are; RES_AJOB, RES_RJOB, VENDOR, TTX_REF.
You can verify this be going to Utilities, View, Data Structure and selecting each file. Scroll down to the bottom to verify the field names, as shown below, and notify RailTech Software Systems if you are having any problems. Once you have verified the repair data structure, you will be ready to obtain the TTX Control Text Files and upload them into the Mars21 program.
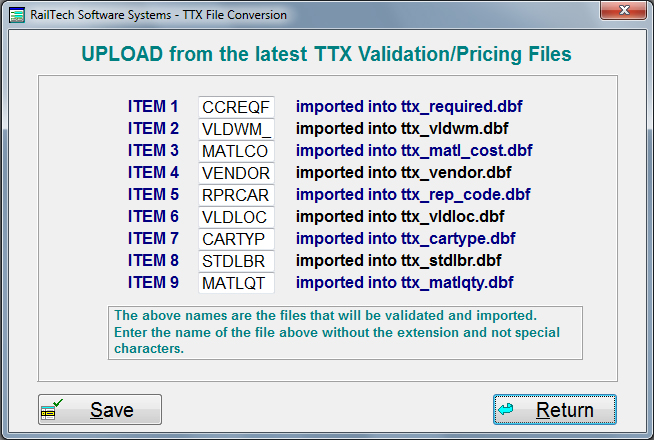
The upload screen shows the name of all the TTX Text Files, or at least the first 6 characters. It also shows the record count of the current file. Not all files are required for you to upload, except for the first upload. You will need to check the files that you want uploaded. You must show the system where the TTX Text Files are located and than press the Upload TTX Files push button. When you do this, the system will than validate that the files are there.
Once the system validates that the files are present, it will than bring the control data into each database and manipulate it for use later in the system.

Be aware that when these files are uploaded, they are found by your computer using a DOS format. Windows looks at these files using a ~1, whenever a file name is greater than eight characters in length. For this reason, you enter only the first 6 characters of the file and our system will do the rest. See below for what the OPTIONS screen looks like If, for some reason or another, TTX changes the names of any of these Text control files, you can press the OPTIONS push button to tell the system what these names are.
Entering a Billing Repair Card
Each Car Initial determine the Class of Repair as well as the Repair Code for that class. A Repair Class is a single
letter code and the TTX Repair Code is a 3 digit code. Example: G003. Each billing repair card must also have
the TTX Repair Type. Currently the TTX Repair Type is one of the following;
Car Body
Rack
Pool
Lease
Defect Card
No Defect Card, JIC
Program
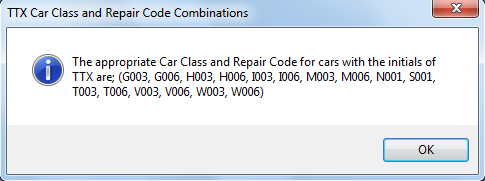
Once you have all the above determine and entered in the heading, the system will than validate to make sure that all data is correct. Example Below shows the message you would recieve if the header informtion does not have the correct TTX Class and Repair Code entered.
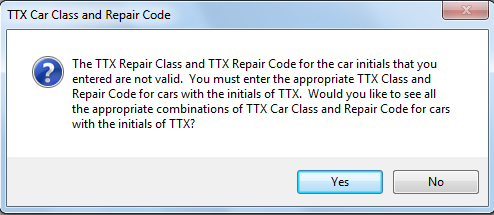
When all the header information has been validated as correct, the main billing repair code screen appears so that you can enter each line of repair.
It is important to note that all Job Codes will have 6 digits. TTX requires that non-TTX job code for material can have associated with it the TTX Material Code and possibly the TTX Vendor Initials. Non-TTX job codes are those job codes that start with 00 with the last four digits being AAR Job Codes.
The non-TTX job codes are still considered to be TTX user job codes since they are 6 digits, but are not TTX specific job codes. The TTX specific job codes are 6 digits with the first two digits greater than 00, example: 901504 and 943720 are TTX specific job codes. The TTX specific job codes do not require either a reference number or a vendor and the last four digits are not associated with any AAR Job Code.
Billing Repair Card Entry Screen
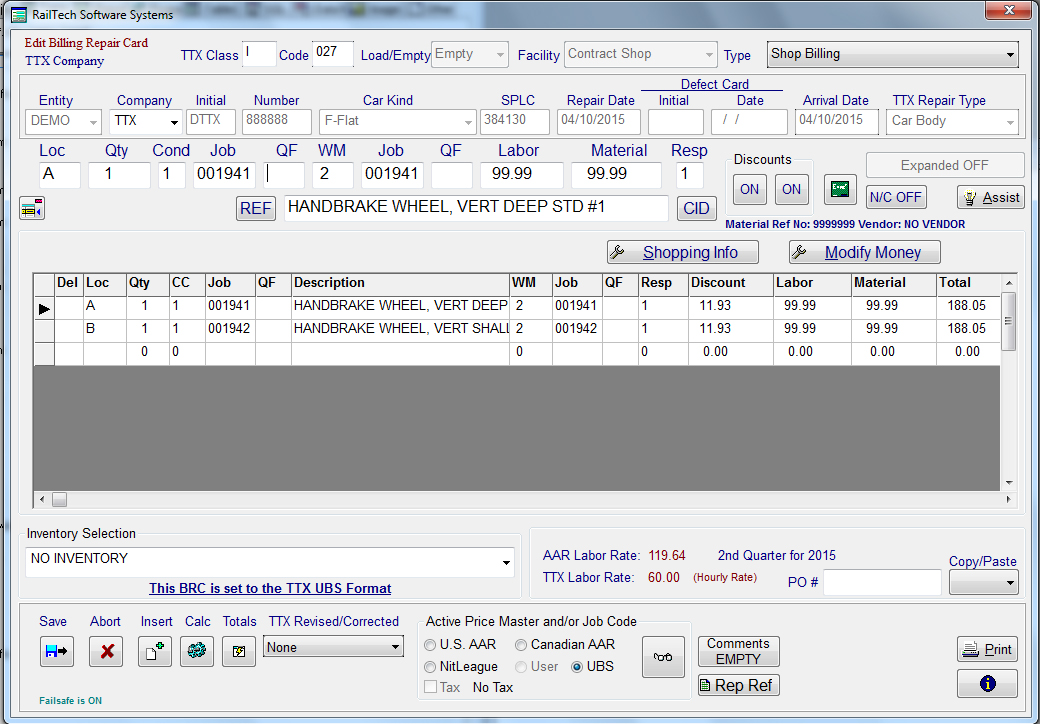
In the billing repair card description line is a push button marked REF, see above. When you press this push button, the screen below appears with the pull-down for the repair description populated.
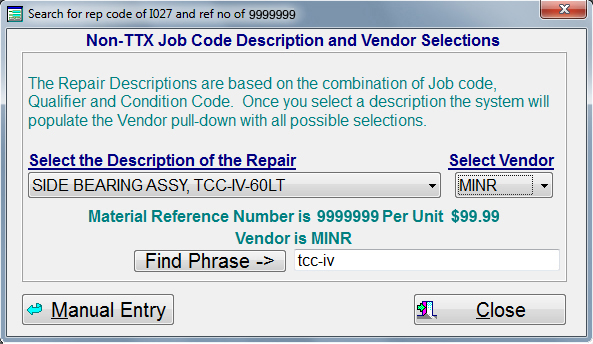
The program will populate the description with all the descriptions assocaited with the combination of applied job code, condition code and qualifier. Some of the list of descriptions can be long, so we assist you with a Find Phrase push button. Just enter a portion of the description as shown above and press the Find Phrase push button. The system will find the first occurrance of that phrase for you to select the proper description.
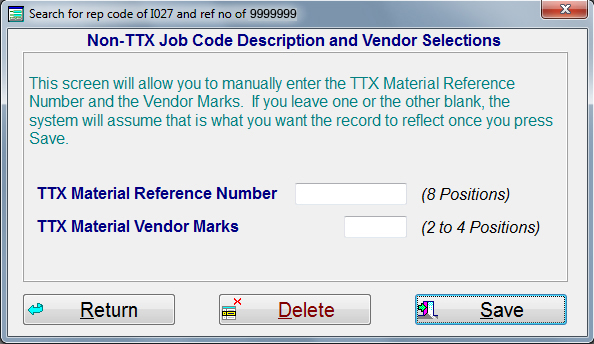
If the system cannot find the Non-TTX Job Code starting with 00, the Manual Entry Screen will appear as shown below. If you want or need to change the TTX Material Reference Number and The Vendor Marks, you can do that by pressing the "Manual Entry" push button on the main TTX Material Selection Screen.
Once you have found your description, the system will display to you what the Material Reference Number is below. It will than look at the TTX Vendor file for that reference number. If that reference number is in the TTX Vendor file, than the Vendor pull-down will be populated with all the possible vendors for you to choose from.
When you close the TTX reference screen and you have selected a description, the system will than ask if you want this data captured for the repair line. If you state YES, than the data is added to that specific line of repair.
If there is no charge entered for the line of repair or the charge entered does not match the charge indicated in the TTX Control Files, the system will ask if you want the TTX Charges to be added. You can overwrite either or both the Labor or Material charges. If the material charge has a charge in it, but the labor charge is blank and there is a labor charge associated with the material item, the system will automatically put that labor charge in.
The labor charge is calcualted from the AAR Job Code for the last four digits of the applied job code. Other job codes, such as Rule 72 items, use the appropriate labor job codes according the the Rules and Regulations of the AAR.
TTX Data Exchange Format
The TTX Data Exchange format is an extended version of the 500 byte file and is created in the proper format when you select TTX Format in the Data Exchange File system. Once you have created the data exchange file, you must log into the TTX Website for uploading the data.