Data Exchange
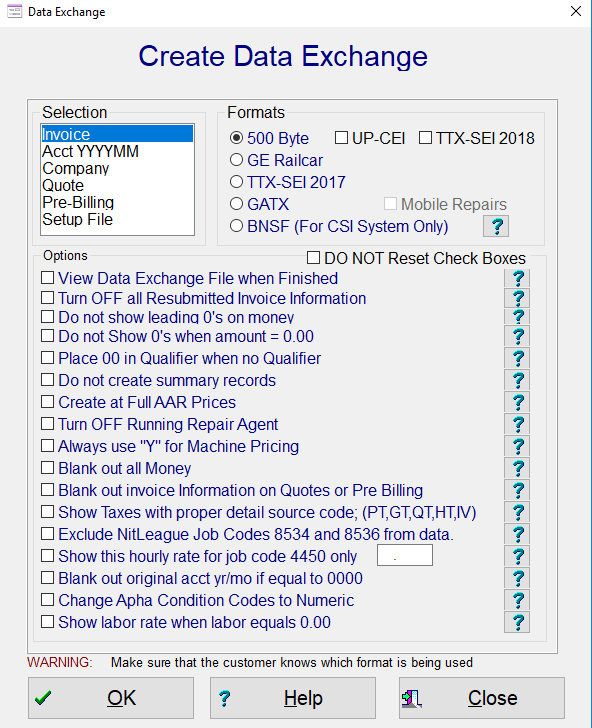
This screen will assist you in creating data exchange files for your customers. You simply make your selection on the left and then the format you what on the right. There are five formats to select from, AAR 500 Byte 2010, AAR 500 Byte 2009, GE Railcar, TTX Format, GATX with or without Mobile Repairs and BNSF CSI Format. There will be some companies that will not be able to unload the new format and therefore we have elected to keep this format. The AAR Old Format is the 160 byte format.
OPTIONS:
The options are for special features that may be required by you when creating data exchange files. You can view the data exchange file in Windows Notepad when finished by checking the first check box. If you check this box, it will stay checked until you uncheck it. If the company you are sending the data exchange file to does not want leading zeros for the money amounts, then check that box. If the company you are sending data exchange file requires that empty qualifiers be filled with 00, then check that box. Some companies do not want summary records; if that is the case for the company you are creating the data exchange file for then check this box. If you are a Running Repair Agent for a company that you are creating a data exchange file for, but the company that you are sending it to does not want the Running Repair Agent Code in the data exchange file, then check the box to turn off the running repair agent. The last two selections are extremely rare and are for specific companies that require the data to not be in the proper format.
If you have the formats selected in the customer profile section of the rolodex file, then the system will automatically check to see if you are using the correct data exchange format. If you are not, the system will inform you what format is expected and ask if you want to use that format.
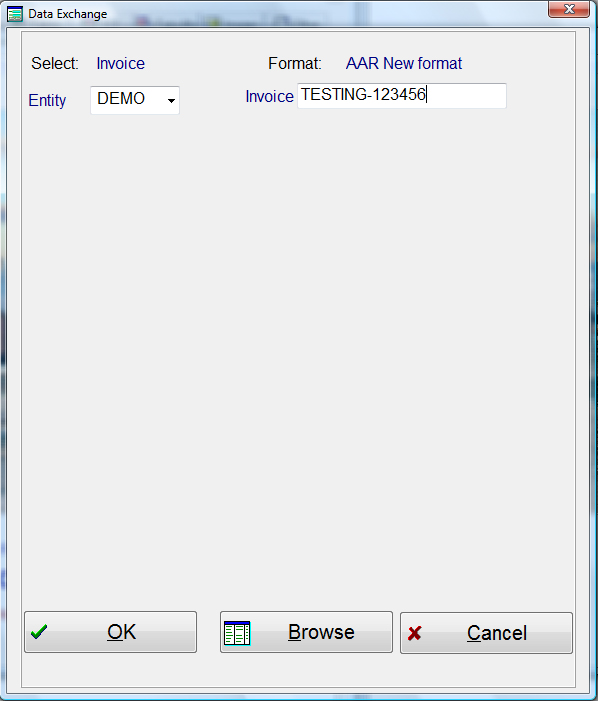
If you select Invoice from the main screen and press the “OK” push button, the next screen that appears will be the invoice designation screen. The invoice number must be exactly as it is in the historical file. That includes spaces as well as any special marks, and it is case sensitive. If you are not sure, it is always best to select the push button “Browse”, which will show you a list of all invoices in the historical file. When you see the invoice you want, highlight it and press the return push button. When the screen above re-appears, the correct invoice number will be in the entry field. If you select Acct YYYYMM, a screen will appear asking for the accounting Year/Month. The invoice accounting period must be in YYYYMM format. Example 201007.
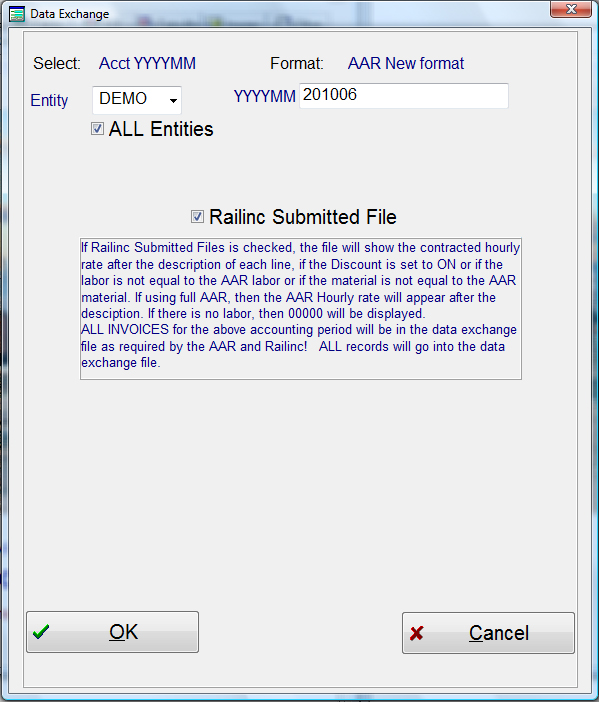
If you create your data exchange file based on the Accounting Year/Month of the invoices and you want more then one Accounting Year/Month, then you can batch the files. This function is only allowable if you select “Railinc Submitted Files Only”! If your system has multiple entities, then you must select “ALL Entities” as well. If you want to batch the files, the enter the Year and Month and press the “Batch Data” data push button. The system will validate that the accounting year/month exist, then inform you how many records are setting in the batch file. When you are finished, press the “OK” push button at the bottom of the screen. The system will now go through its validation of data and create the data exchange file in the proper format.
Why have Railinc Submitted Files Only check box?
Effective January 1, 2009 Railinc will consider all errors, (including what is now considered non critical errors), as CRITICAL ERRORS and reject your entire file if any error exist! This include sending them data on companies that are not registered with them. This way when you designate in the Customer Profile of the Rolodex file what companies are classified as Railinc Submitted Files Only, then only those files will be created. The system will also ignore if you check “Do not write hourly rate on data exchange file”, as Railinc requires this entry. The hourly rate in your Customer Profile for each customer will be in each line of repair on the data exchange file where you have discounted the line and there is a labor charge. If you have not discounted the line, then the labor rate in the AAR Price Master for the date of repair will appear. If there is no labor charge, or the price master can not be found for that date, then 00000 will appear in your labor amount. Also, any special formatting such as TTX will be ignored and automatically be converted to the Railinc data exchange format. If your customer profile has the check box “Do not write hourly rate on data exchange file” checked and you create a data exchange file without the Railinc Submitted Files Only checked, then the labor amount will not appear in the file.
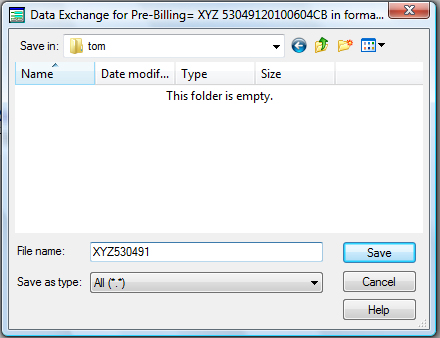
Once you have entered the correct invoice number above and pressed the “OK” push button, then the above screen will appear. This screen allows you to name the file whatever you want. The normal extension is .dat, but some like to use .txt. The file name can not be over 8 characters long plus the extension, and can not have any special characters. It can only contain letters and number with no spaces. If you want to select another drive, such as A:, then select it by using the Drive selection at the lower right. To move up or down directories with the drive you are in, double click on the directories on the right. Once you are finished, press the “OK” push button and the file will be saved as you have directed. If the same name is already present, the system will ask you if you want to overwrite the existing file.
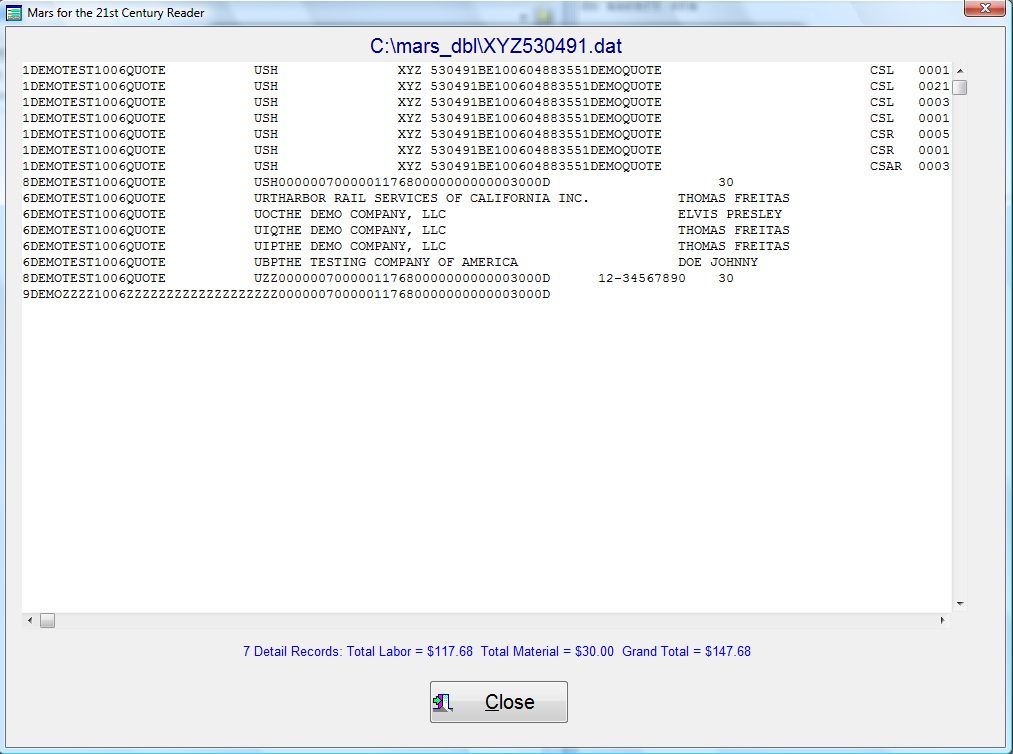
If you had selected the check box on the first page to view the exchange file when finished, a screen would appear stating that the file has been transferred usefully. It would also state that when you press the “OK” pushbutton, note pad would open with the created file and the screen below would appear with the information created.