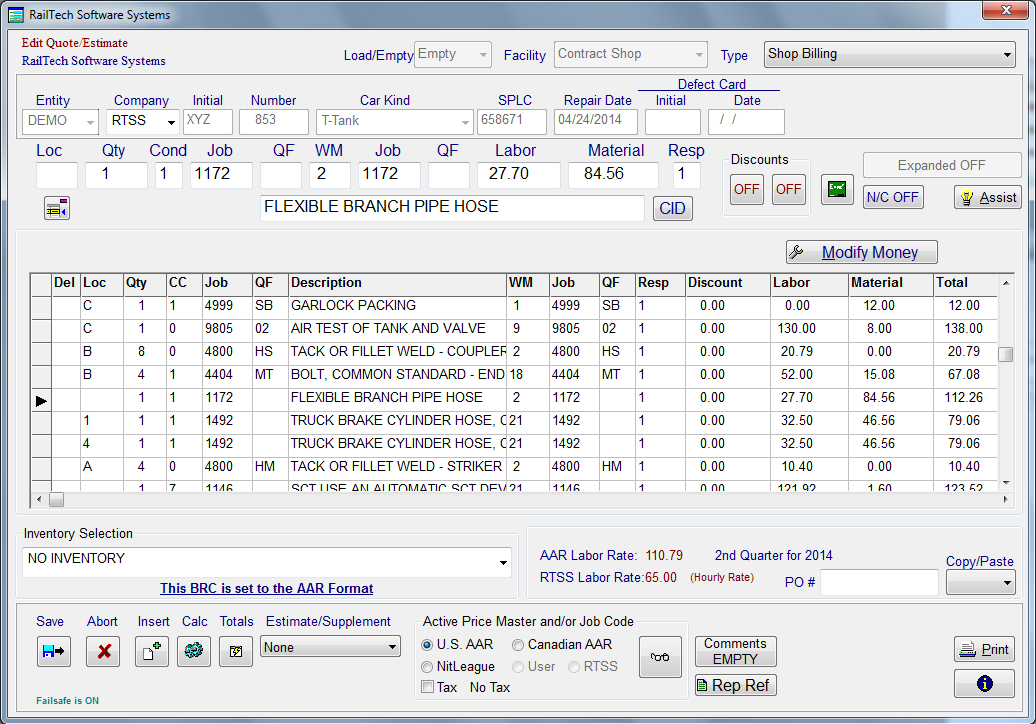
Assist
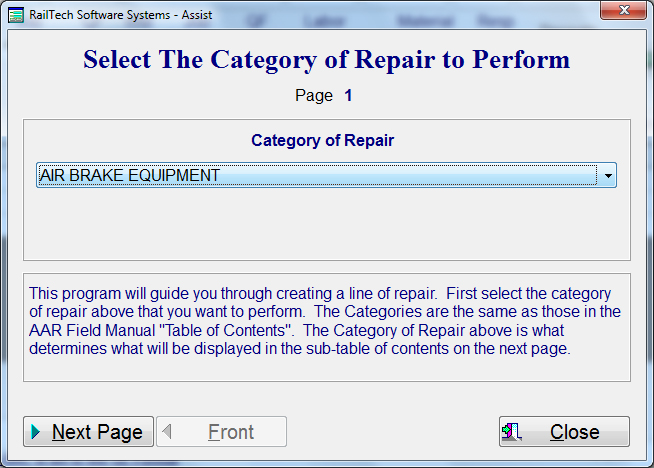
At the bottom right side of the billing repair card screen is a push button marked “Assist.” If you look at your Field Manual of the AAR Interchange Rules table of contents, you will notice the similarities. With the assist, you can create a line of repair without entering any information. It is designed to allow you to simply pick and select in a logical order. The first screen that appears is the Select the category of repair to perform screen.
As you can see in the above picture, each category is the same as the highlighted category in the Field Manual of the AAR Interchange Rules table of contents. Select a category, then press the push button “Next Page.”
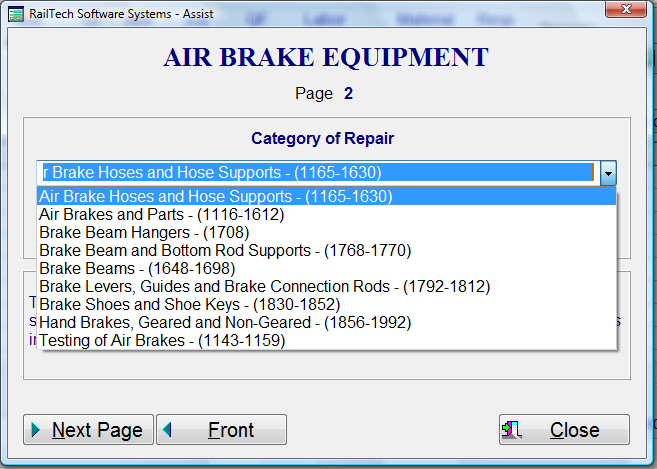
If the Category of Repair was “AIR BRAKE EQUIPMENT”, then all the sub-categories
would appear on this screen. If you
notice in your Field Manual of the AAR
Interchange Rules, the sub-categories on this screen are the same as the
sub-categories in the manual. Once
you select a sub-category, you are ready to press the push button “Next Page”.
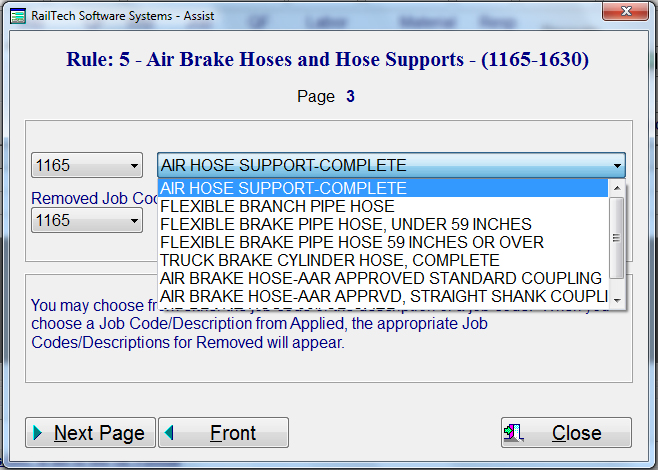
The next screen that appears is the applied and removed job code screen. If you were to select applied job code, then all the valid applied job codes for Rule 5 would appear. If you would rather use the description field on the right, It will display all the valid descriptions for Rule 5. Once you have selected either a valid applied job code or a valid applied description, then the removed job codes as well as the removed descriptions will only show the valid job codes that can be removed based on the applied job code. This screen will also function in the reverse order. If you were to select a removed job code or description, then only the valid applied job codes and descriptions would be available in the applied section. Once you have made your selections, you would then press the push button “Next Page”.
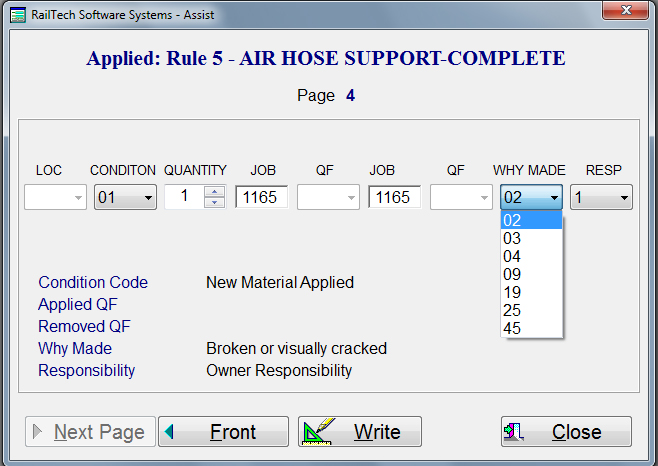
The next screen to appear is the detail screen. Here, the system will display all the valid coding for the job code that you have selected. If a code is not required, then that selection will be inactive. Note that LOC, QF and QF are all inactive. This is because this job code, 1172, does not require any of those selections. I might add here, that you can not change either the applied or removed job code on this screen either. All active fields will have drop downs to choose from. Each drop down shows only the valid selections for that drop down. When you select an item from a drop down, the description of that item appears on the left side of this screen. The Quantity selection will always be a spin box, which allows you to go up or down in quantity. However, the quantity will not allow you to go over the maximum quantity or under the minimum quantity. If you want to abort at this time, you would simply select the push button “Quit”. If at anytime you need to go back to the previous screen and make a change, just press the push button “Previous.” If you want to accept this line of repair, then press the push button “Write”, and the line of repair will write to the billing repair card, price it and move to the next line as shown below.