Inventory Control Screen
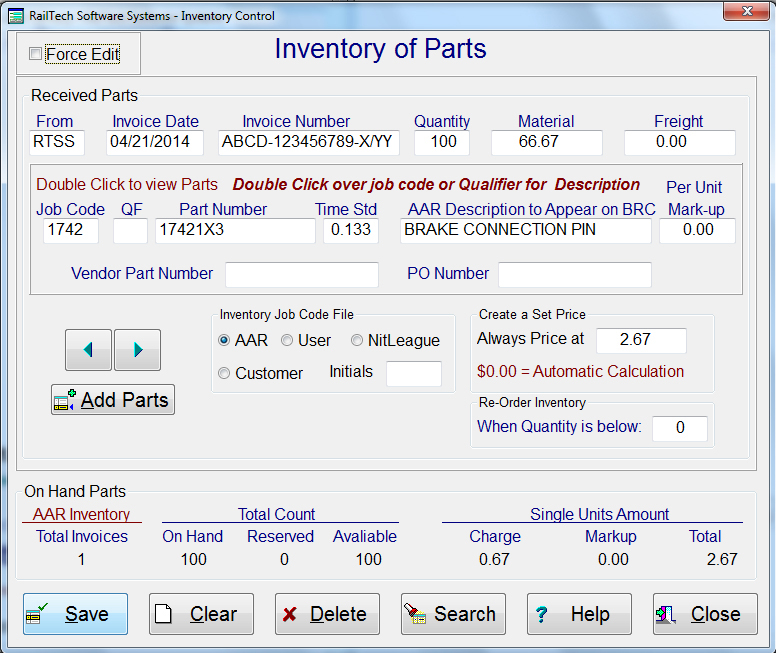
As you receive inventory, you enter it on this screen. One invoice could have several lines, separating the items of inventory. This screen will allow you to designate the AAR Job code, the labor time standard and a per unit mark-up. You can also designate when you want to be notified that the item needs to be re-ordered.
There are several ways that inventory can be priced. The selections on the pricing instructions are on the billing repair card screen. When you use inventory it is put into a reserve account. Once you invoice and send the invoice(s) to history, the inventory is then removed from the total count. However, if you were to move a billing repair card or invoice out of history and into the quote/estimate file, the inventory would then be added back to the reserve account and into the inventory total.
In order to maintain integrity of the inventory, when you edit a billing repair card or quote/estimate, the reserve is sent back into inventory. This way, if you add, reduce quantity or delete a line of repair, the inventory stays correct.
If you are using inventory in the billing repair card or quote/estimate program, the system will notify you that inventory needs to be re-ordered if the item you are entering is equal to or less then the quantity for re-ordering that you entered in the inventory screen.

In the inventory file, if you press the “Add Parts” push button, then this screen will appear. This screen allows you to designated different description, unit prices and on hand quantity for a specific inventory item. Each item under the main job code selection is automatically assigned a sequence number starting with 1. By clicking on the sequence number you can edit the item or delete it. Once you have changed a record or if you decide to delete an item, then you must select the appropriate radio button in the “Action” box and press the OK push button. This does not save the record in the multiple inventory file, it only keeps this information for saving. When you are ready to post the changes or additions, then press the “Save all Changes” push button at the bottom of the screen. If you press the “Cancel all Changes” push button, then all previous changes are reverted back to what they were.